

Installing Govee permanent outdoor lights is one of the best ways to give your home a polished, year-round lighting setup without dragging out string lights every season.
I love permanent lighting because it does more than decorate your house for the holidays. It can highlight your roofline, improve curb appeal, add a warm glow after sunset, and give you flexible color options for every season, event, or mood. With the Govee Home app, you can control brightness, color, scenes, timers, and smart features right from your phone.
But here is the thing most homeowners figure out pretty quickly: the lights are only as good as the installation.
A rushed install can leave you with crooked lines, exposed wires, uneven spacing, weak adhesive, or a lighting effect that does not look the way you imagined. A clean Govee permanent outdoor lights installation takes planning, the right tools, proper spacing, and secure mounting brackets that help everything stay in place.
At Deliciosa Decor, I create precision-fit custom light mounts for popular systems like Govee outdoor lights, Eufy, Nanoleaf, and more. My goal is simple: make permanent lighting easier, cleaner, and more reliable for DIY homeowners, seasonal decorators, and professional installers. As a Veteran-owned design studio, I care about craftsmanship, durability, and getting the details right the first time.


This ultimate guide will walk you through the full process so you can install your permanent outdoor lights with a cleaner look, better spacing, and fewer common issues.
Why Govee Permanent Outdoor Lights Are So Popular
Govee permanent outdoor lights have become a favorite for many homeowners because they offer a mix of smart control, bright color options, and year-round flexibility.
Instead of installing and removing holiday lights every year, permanent lights stay in place. You can use them for Christmas, Halloween, birthdays, game days, backyard parties, or simple everyday accent lighting. Many Govee systems also support voice control through smart home platforms like Google Assistant, which makes them even easier to use once they are connected through the Govee Home app.
Another reason people love Govee lights is the lighting effect. The permanent outdoor systems are designed to cast light down the wall or exterior surface, which helps create that clean, decorative glow across the front of your home. Govee’s Pro product page notes that its upgraded lens design creates a better triangular lighting effect, and the lights support both warm white and cold white lighting for daily and festive use.
That triangular lighting effect is one of the biggest reasons spacing matters so much.
If the lights are too close, too far, or placed unevenly, the glow can look inconsistent from the street. If the wires sag or the adhesive pads fail, the whole setup can start looking messy fast.
That is why I always recommend thinking beyond the basic install. The goal is not just to get the lights on the wall. The goal is to create a system that looks intentional, secure, and professional.
Before You Start Your Govee Permanent Outdoor Lights Installation
Before you start climbing ladders or sticking adhesive pads to your home’s exterior, slow down and plan the full installation.
This is the step most homeowners want to skip, but it makes the biggest difference.
Start by walking around your house and deciding where you want your Govee permanent outdoor lights to run. Look at your roofline, soffits, fascia, corners, garage area, porch, brick, wood, fences, and any exterior features that may affect the route.
You will want to think about:
- Where the power source is located
- Where the control box will sit
- Where each strand will begin and end
- How much total length you need
- Where wires and connections will be visible
- How corners will be handled
- Whether your surface is wood, vinyl, brick, metal, or painted material
- Whether you want the lights tucked away or more visible
- How far from the wall the lights should sit
Govee’s installation guide recommends cleaning the wall surface first and placing the string lights about 3 to 8 cm from the wall surface, with many users choosing their distance based on the effect they want.
That distance affects the final look. A closer placement can create a tighter beam, while a little more distance can create a wider wash of light. The main thing is consistency.
If one light is 2 inches from the wall and the next is 5 inches from the wall, you will probably see the difference at night.
Tools and Materials You May Need for Permanent Outdoor Lights
Having the right tools ready before you start will make the process much smoother.
For a clean Govee permanent outdoor lights installation, I recommend gathering:
- Tape measure
- Pencil or marking tool
- Ladder
- Drill or screwdriver
- Exterior-rated screws when needed
- Cleaning cloth
- Rubbing alcohol or surface cleaner
- Cable clips
- Mounting brackets
- Govee light strands
- Power adapter
- Control box
- Extension cables if included
- Govee Home app
- Smartphone
- A second person for safety
A tape measure is one of the most important tools in the whole process. It helps you keep proper spacing, measure your roofline, mark your light placement, and make sure your layout matches the length of your Govee system.
A sturdy ladder is also essential. Any time you are climbing ladders near a roof, take your time. Do not rush the process, and do not overreach. If a section feels unsafe, it is worth hiring a professional installer.
Professional installers usually care about speed, consistency, and clean results. DIY homeowners usually care about making the process simple and avoiding mistakes. The good news is that both groups benefit from better planning, better brackets, and a cleaner install.

Photo by David Pennington on Unsplash
Test Your Govee Lights Before Installing Anything
Before anything goes on the wall, plug in your Govee lights and test the full system.
This is a simple step, but it can save you a massive headache.
Lay out the light strips or permanent light strands on the ground, connect the sections, plug in the power supply, and open the Govee Home app. Make sure the lights turn on, connect properly, respond to the app, and display the colors or scenes you want.
This is also the time to check your account, Wi-Fi connection, Bluetooth connection, and smart home settings if you plan to use Google Assistant or another voice control setup.
If something does not work, it is much easier to fix it while everything is on the ground.
Once the lights are installed along your roofline, troubleshooting becomes harder, slower, and more frustrating. Testing first helps you catch connection issues, dead lights, app pairing problems, or power issues before you are halfway through the installation.
Clean the Surface Before Using Adhesive Pads
Most Govee outdoor lights come with adhesive pads or adhesive backing to help attach the lights to your home’s exterior.
The problem is that adhesive is only as strong as the surface underneath it.
If you stick adhesive pads to dust, pollen, dirt, moisture, paint residue, or textured material, they may not hold well. This is one of the most common issues I see with DIY permanent outdoor lighting installs.
Before mounting anything, clean the surface carefully. Use a clean cloth and rubbing alcohol or another safe surface cleaner. Let the area dry fully before applying the lights, clips, or mounts.
This step matters whether you are installing on wood, painted trim, vinyl, metal, brick, or another exterior surface.
Adhesive pads may work fine at first, but outdoor conditions are tough. Heat, cold, humidity, wind, rain, and surface texture can all affect how long the adhesive holds. That is one reason many homeowners and professional installers use mounting brackets for a stronger, cleaner installation.
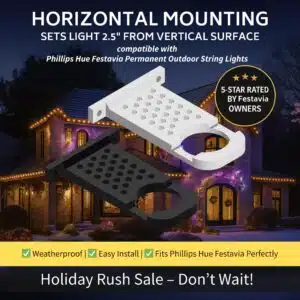
Why I Recommend Mounting Brackets for Govee Permanent Outdoor Lights
Adhesive pads can help with basic placement, but mounting brackets give your permanent lights a more secure and professional finish.
At Deliciosa Decor, I design custom light mounts because I know how frustrating it is when a great lighting system looks messy because the installation hardware is not strong enough or clean enough.
Good brackets help:
- Keep lights evenly spaced
- Reduce sagging wires
- Improve the final lighting effect
- Create a cleaner roofline
- Support a more permanent installation
- Make the setup look more professional
- Help installers save time
- Reduce reliance on adhesive alone
For Govee permanent outdoor lights, brackets can be especially helpful because spacing and angle matter. The goal is to keep every light consistent so the glow looks intentional from the street.
A clean mount also helps hide or control wires. Nobody wants to spend money on permanent outdoor lights and then see loose wires hanging across the exterior of the house.
With the right mounts, your system looks more finished during the day and better at night.
Proper Spacing for a Better Triangular Lighting Effect
The better triangular lighting effect is one of the main reasons homeowners choose Govee permanent outdoor lights.
That effect happens when each light casts a defined glow down the wall. When the lights are evenly spaced and aligned, the pattern looks clean, balanced, and high-end.
When the spacing is off, the effect can look uneven.
Use a tape measure and decide on your spacing before you start attaching lights. Mark each location lightly so you can keep the distance consistent across the full run.
You also need to decide how far the lights should sit from the wall. Govee’s own installation content recommends placing the lights 3 to 8 cm from the wall surface after cleaning the wall.
That small detail changes the whole look.
Closer spacing can create a sharper look. More distance can soften the light and spread it wider. Neither is automatically wrong. What matters is choosing the style you want and keeping that distance consistent across the system.
How to Install Govee Permanent Outdoor Lights Step by Step
Here is the basic govee permanent outdoor lights installation process I recommend for most homeowners.
1. Measure the Total Length
Start by measuring the full path where your lights will go.
Measure along the roofline, around corners, across the garage, under soffits, and anywhere else the lights will run. Compare that number to the total length of your Govee system.
Do not guess.
A small measuring mistake can leave you short at the end of the install or force you into an awkward layout. Measure first, then create a plan.
2. Choose Your Starting Point Near Power
Your starting point should make sense with your power source.
Look for a safe outdoor outlet and decide where the power adapter and control box will go. Keep in mind that Govee notes the Pro series outdoor string lights are IP67 waterproof, while the control box is IP65 rated, and the adapter is for indoor use only.
That means you should always follow the specific user manual and product safety instructions for your exact model.
Plan your install so power, wires, and connections are protected and accessible.
3. Test the Lights in the Govee Home App
Connect the lights before mounting them.
Open the Govee Home app, pair the system, and test colors, brightness, scenes, and controls. If you want voice control, confirm that your Google Assistant setup works before the lights are permanently mounted.
4. Clean the Installation Surface
Wipe down the surface where each light, clip, or bracket will go.
This helps adhesive pads stick better and gives your mounts a cleaner surface to work with.
5. Mark Your Spacing
Use a tape measure to mark the placement of each light.
Proper spacing is what creates a clean look. This is especially important if you want the triangular lighting effect to look even across your home.
6. Install the Mounting Brackets
Attach your mounting brackets according to your surface type.
Wood, brick, vinyl, metal, and painted trim may require different screws, anchors, or installation methods. Make sure the mount is secure before moving to the next light.
7. Attach the Govee Lights
Once the mounts are in place, attach each light.
Keep your wires neat as you go. Use clips where needed to reduce sagging and keep connections tucked away.
8. Manage Wires and Connections
This is where a clean install really comes together.
Hide or secure wires where possible. Avoid letting wires hang loosely. Keep connections protected and make sure nothing is pulled too tight.
Visible wires are one of the biggest differences between a quick DIY install and a polished professional-looking result.
9. Test Again Before Finishing
Once everything is mounted, turn the system on again.
Check the lights during the day for alignment and at night for brightness, spacing, color, and overall style.
Make any adjustments before you consider the installation complete.
Common Issues With Govee Permanent Outdoor Lights Installation
Even with a simple installation, common issues can come up.
The most common ones include:
- Uneven spacing
- Weak adhesive pads
- Exposed wires
- Loose clips
- Lights placed too far from the wall
- Lights placed too close to the wall
- App connection issues
- Power problems
- Improperly protected connections
- Not enough total length
- A visible control box
- Poor planning around corners
Most of these problems are preventable.
Measure before you install. Test before you mount. Clean the surface. Use strong mounting brackets. Keep wires neat. Follow your model’s instructions. Check your work at night before calling the project done.
The goal is not just to install lights. The goal is to create a system you actually love looking at.
Govee Home App Setup Tips
The Govee Home app is where your permanent lighting system really comes to life.
Once your lights are installed and connected, you can use the home app to control brightness, colors, scenes, timers, schedules, and other smart features. Many users love being able to create different looks for holidays, seasons, parties, and everyday use.
A few simple installation tips for app setup:
- Create or log into your Govee account before installation
- Pair the lights while they are still easy to access
- Make sure your Wi-Fi signal reaches the control box area
- Test brightness before finalizing placement
- Try warm white and cold white lighting at night
- Save favorite scenes for quick access
- Connect Google Assistant if you want voice control
The app is also helpful for checking the final look. Once the lights are mounted, stand back from the house, test different brightness levels, and see how the colors look from the street.
Sometimes full brightness is not always the best look. A softer glow may create a cleaner, more polished effect.
Should You DIY or Hire a Professional Installer?
Some homeowners can absolutely handle a Govee permanent outdoor lights installation on their own.
If your roofline is simple, your home is one story, your outlet is easy to access, and you are comfortable climbing ladders, this can be a manageable DIY project.
But not every home is simple.
You may want a professional installer if:
- Your home has multiple stories
- Your roofline is steep or complex
- You are uncomfortable on ladders
- You want a very clean professional finish
- You are installing a long run
- You need help hiding wires
- You have brick, metal, or tricky exterior surfaces
- You want the job done faster
Professional installers also benefit from reliable mounts. The right brackets can save time, improve consistency, and help create a cleaner finished product for customers.
That is one reason I build mounts for both homeowners and installation companies. Whether you are doing one house or multiple installs every week, the hardware matters.
How Deliciosa Decor Helps Create a Cleaner Installation
At Deliciosa Decor, I care about the details because details are what make the final project feel finished.
My custom light mounts are designed to help homeowners and installers create cleaner, more secure permanent lighting setups. Instead of relying only on adhesive pads or trying to force a generic clip to work, you can use mounts made with fit, function, and presentation in mind.
Deliciosa Decor is Veteran-owned, and that shows up in how I approach every product: discipline, precision, durability, and pride in the finished result.
My mounts are designed for popular lighting systems like Govee, Eufy, Nanoleaf, and more. I also continue expanding the catalog for new models, and custom requests are available when customers need something specific.
Every order includes free nationwide shipping, and an automatic 25% discount is applied to all purchases. There are no minimum order requirements, so you can order what you need whether you are testing one section, installing your whole home, or buying in bulk for professional work.

Photo by DongHoo Kim on Unsplash
Final Installation Tips for a Clean Look
Before you begin your install, keep these final tips in mind:
- Measure everything before starting
- Test the system on the ground
- Clean every mounting surface
- Use a consistent distance from the wall
- Keep proper spacing between lights
- Use brackets for a stronger hold
- Secure wires as you go
- Avoid loose or exposed wires
- Check the look at night
- Follow the instructions for your exact Govee model
A clean Govee permanent outdoor lights installation is not about rushing. It is about setting yourself up for success before the first light ever goes on the wall.
When done well, your lights can make your home look polished, festive, and welcoming all year long.
Make Your Govee Permanent Outdoor Lights Installation Easier
Installing permanent outdoor lights should feel exciting, not overwhelming.
With the right plan, the right tools, proper spacing, and secure mounting brackets, you can create a cleaner, stronger, and more professional-looking setup for your home.
At Deliciosa Decor, I build custom mounts to make that process easier for DIY homeowners, holiday decorators, and professional installers who care about clean results.
Whether you are installing Govee permanent outdoor lights, upgrading your current system, fixing common issues, or planning a full exterior lighting project, I’m here to help you get a cleaner look from the start.
Shop Deliciosa Decor custom light mounts today.
Helpful Resources for Govee Permanent Outdoor Lights
If you want to get more from your Govee Permanent Outdoor Lights, the right resources can save time, prevent install mistakes, and spark new ideas. Here are seven links worth bookmarking, from official support pages to DIY-friendly community spaces.
- Govee Official Website: https://www.govee.com/ This is the best starting point for product details, feature updates, and compatibility information. It’s especially useful if you want to compare Govee Permanent Outdoor Lights models or confirm specs before installation.
- Govee Support Center: https://support.govee.com/ The support center helps with setup steps, troubleshooting, warranty questions, and product FAQs. If your lights are not connecting, syncing, or responding as expected, this is one of the first places to check.
- Govee Home App: https://www.govee.com/app The Govee Home App is where you control scenes, schedules, brightness, and color effects. It also helps you unlock automation features, which makes daily use much easier once your lights are installed.
- Govee YouTube Channel: https://www.youtube.com/@GoveeOfficial Govee’s YouTube channel can be helpful for visual learners who want to see product demos, setup walkthroughs, and feature tips in action. Here’s the key difference: watching an install or app demo is often faster than reading a manual.
- Govee Community: https://community.govee.com/ This type of inspiration page is useful when you want ideas for rooflines, accent zones, seasonal colors, or everyday curb appeal. If you only remember one thing, remember this: good outdoor lighting design starts with a plan, not just a product.
- Reddit Govee Community: https://www.reddit.com/r/Govee/ Reddit gives you access to real-world advice from other Govee users who share install photos, mounting ideas, and troubleshooting tips. For example, if you’re deciding how to route lights around corners or peaks, user posts can make that choice much clearer.
- YouTube DIY Installation Tutorials: https://www.youtube.com/results search_query=Govee+Permanent+Outdoor+Lights+installation Third-party DIY tutorials can show practical install methods, spacing ideas, and lessons learned from homeowners. This is helpful if you want to see how others handle soffits, clips, outlets, or tricky roof sections before you start your own project.
These resources can help you plan better, install with more confidence, and fine-tune your setup after the lights are up. Next up, you can move from research into layout planning and installation prep.


