

I am Josh Chretien, the founder of Deliciosa Decor. As a Disabled Marine Corps Veteran, I have always valued precision, resilience, and doing things right the first time. Over the years, I have spoken with countless homeowners and professional installers who wanted to upgrade their homes with smart lighting. They buy beautiful lighting kits, expecting a quick weekend project, but often end up frustrated. Without proper planning, a Govee permanent outdoor lights installation can quickly turn into a messy, sagging disaster.
I have seen it all. Wires hanging loosely from gutters. Adhesive failing after a single hot summer day. Uneven spacing that makes the lights look chaotic rather than clean. That is exactly why I started designing precision-fit 3D printed mounts. I wanted to help homeowners and professionals avoid these exact frustrations.
This guide will save you time, money, and massive headaches. By walking you through the most common errors I see, you will know exactly how to prepare, execute, and maintain a stunning outdoor lighting setup.

Photo by Knopka Ivy on Unsplash
1. The Biggest Mistakes I See in Govee Permanent Lights Installation
When you invest in permanent outdoor lighting, you want it to look pristine. You want a flawless glow washing down the side of your home. However, small mistakes during the installation process can easily ruin an entire run of permanent outdoor lights.
A single light placed out of alignment catches the eye immediately. A wire left exposed disrupts the clean architectural lines of your house. Many people assume they can just peel the tape, stick the lights to the soffit, and plug them in. Unfortunately, that approach rarely lasts. Let us look closely at the specific errors that cause these systems to fail and how you can prevent them.


2. Skipping Planning Before Installing Permanent Outdoor Lights
The excitement of opening a new tech gadget often leads people to skip the most critical step: planning. When you are installing permanent outdoor lights, you cannot afford to guess.
Many people fail to measure their house accurately. They do not map the full layout, which leads to running out of lights halfway across the roofline. Others completely ignore power source placement, leaving them scrambling for an extension cord that looks terrible. Furthermore, if you do not consider the direction and visibility of your permanent lights at night, you might end up blinding your neighbors or washing out your windows.
My recommendation is simple. Always plan your entire run before installing. Measure your roofline twice. Test the lights on the ground first to understand how they cast light against your siding.
Helpful Resource 1: Check out the Govee Official User Manuals to review the exact specifications and length of your light strings before mapping your roofline.
3. Using Adhesive Pads Alone (And Why That Fails Over Time)
One of the most frequent installation tips you will hear is to thoroughly clean the surface before sticking the lights up. While cleaning is necessary, relying solely on adhesive pads is a huge mistake.
Adhesive pads fail. Heat from the summer sun bakes the glue. Winter moisture freezes and thaws it. Over time, the tape gives out. The real-world result is drooping wires and lights dangling sadly from your eaves.
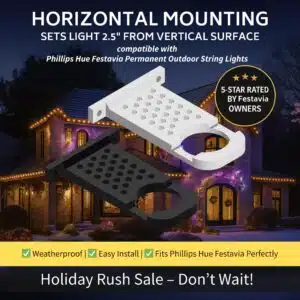
What I recommend instead is utilizing secure mounting solutions. Relying on adhesive alone is a gamble you will eventually lose. This is why our custom Deliciosa Decor mounts improve durability and alignment. They physically hold the lights in place with screws, ensuring they stay exactly where you put them, regardless of the weather.
4. Incorrect Spacing and the “Best Distance” Problem
Creating a professional look requires even, consistent spacing. Why does uneven spacing ruin the clean lighting effect? Because the human eye is incredibly good at spotting patterns—and breaking them.
When you place each single light at varying distances from the wall, the cones of light hitting your siding will look distorted. Some will be sharp and narrow, while others will be soft and wide. To find the best distance for a professional look, you need to test a few lights on your specific eaves. Usually, keeping the permanent outdoor lights two to four inches from the wall creates a beautiful scalloped effect.
My top tip here is that consistency matters more than guesswork. Use a spacer block (a simple piece of wood cut to your preferred distance) to ensure every outdoor light sits at the exact same depth.
Helpful Resource 2: For great visual examples of light positioning, watch Chris Maher’s Smart Lighting YouTube Channel, which features excellent demonstrations on wall-washing effects.
5. Poor Wire Management and Visibility Issues
Leaving wires exposed or loosely hanging makes an expensive smart lighting system look cheap. Running lights without considering the structure of your house—like the roofline, siding, or support posts—leads to messy routing.
Poor routing affects both safety and aesthetics. Wires flapping in the wind can eventually degrade the internal connections. From an aesthetic standpoint, you want a clean install where the lights seem built into the house.
My approach to clean, hidden installations involves pulling the wires tight and securing them with proper hardware. If you must run a wire down a wall, use color-matched raceways to hide the cables completely.
Helpful Resource 3: If you need to hide cables along siding, The Hook Up offers amazing smart home tutorials on cable management and hiding wires seamlessly.
6. Not Using the Right Tools for Installation
Many weekend warriors take DIY shortcuts that cause long-term issues. Trying to install lights using just your thumb and a roll of duct tape will not cut it.
Proper tools make installation faster and significantly safer. The right tools ensure that your screws go in straight and your brackets do not crack. I always recommend having a few basic tools ready: a sturdy, reliable ladder, a cordless drill, a tape measure, a chalk line, and the appropriate screws for your soffit material.
Do not risk your safety or the integrity of the project by balancing on a chair. Get a proper ladder and use the right fasteners.
Helpful Resource 4: Before getting off the ground, read through Family Handyman’s Ladder Safety Tips to ensure you are setting up your equipment securely.
7. Power Source and Connectivity Mistakes
The technical side of permanent lighting often trips people up. Overloading circuits or choosing a poor power placement can lead to system failures.
Many installers start hanging lights without planning where to plug in or route power. You cannot simply chain dozens of light strips together endlessly; you will suffer voltage drop. This causes the lights at the end of the run to look dim or display the wrong colors.
To ensure reliable performance, read the manufacturer limits on how many segments you can connect to a single power source. Make sure your outdoor plug is housed in a weatherproof enclosure, and ensure your system has a proper ground.
Helpful Resource 5: To understand the electrical limits of LED strips, the QuinLED voltage drop guide is a fantastic technical resource for planning power injections.
8. Misusing the Govee Home App During Setup
The hardware is only half the project. The software controls the magic. A surprisingly common issue is misusing the Govee Home App during the initial setup.
People often rush through the home app configuration, resulting in issues with syncing, brightness, and automation. If you group your lights incorrectly in the Govee app, your holiday animations will run backward or out of sync.
I recommend configuring your system patiently. Label your controllers clearly in the app. Set up routines so the lights turn on automatically at sunset and off at sunrise. You can also integrate the system with Google Assistant or Alexa for voice commands. Making the most of smart controls turns a good lighting setup into a great one.
Helpful Resource 6: To get your lights responding to voice commands, follow the official Google Assistant Setup Guide for Smart Home Devices.
9. Ignoring Weather and Environmental Factors
Your lights will live outside 365 days a year. How heat, heavy rain, and freezing cold affect your installation cannot be understated.
Many people use basic indoor zip ties or standard steel screws that rust after the first rainstorm. Material choice matters heavily for long-term durability. UV rays will destroy cheap plastics, making them brittle and prone to snapping.
My advice for making your outdoor lights last year-round is to use stainless steel screws and UV-resistant mounts. Consider the climate of your specific region and build the system to withstand your worst local weather.
Helpful Resource 7: For general tips on protecting outdoor electronics from moisture, This Old House provides excellent guides on exterior home weatherproofing.
10. Trying to “Fix It Later” Instead of Doing It Right the First Time
We have all been there. You are tired, the sun is setting, and you decide a slightly crooked light is “good enough for now.” You tell yourself you will fix it later.
Quick fixes usually lead to bigger problems. If one light sags, it puts tension on the wires, eventually pulling the adjacent lights down too. The cost of reinstallation is always higher than doing it properly upfront. You end up wasting more time dragging the ladder back out and buying replacement parts.
My philosophy has always been: build it once, build it right. Take the extra five minutes during the installation process to secure every single point.
11. How I Make Govee Permanent Outdoor Installation Easier
I saw these problems happening over and over, which is why I created solutions at Deliciosa Decor. Our products solve these exact issues by providing a mechanical, screw-in hold that totally eliminates the need to rely on weak adhesive tape.
Whether you are a DIY homeowner tackling your first project, a holiday decorator prepping for the winter, or a professional mounting installer, our products make your life easier. We emphasize precision-fit mounts that wrap perfectly around the Govee permanent outdoor light nodes. They offer ultimate durability and ease of use, ensuring your lines stay perfectly straight and incredibly secure.
Your Installation Should Be Simple, Clean, and Built to Last
Installing smart exterior lighting should be a rewarding project that boosts your home's curb appeal. By avoiding these common mistakes—like skipping the planning phase, relying on weak tape, and mismanaging your wires—you guarantee a better result.
I encourage you to approach your installation with confidence. Take your time, measure carefully, and use the right hardware. At Deliciosa Decor, our mission is helping customers create something lasting and beautiful. We believe your home deserves craftsmanship and care.
Ready to make your project bulletproof? Explore the custom light mounts and secure solutions from Deliciosa Decor.

Photo by Valeriia Svitlini on Unsplash
Ready to simplify your Govee permanent outdoor lights installation?
Stop fighting with failing adhesive and crooked light lines. Upgrade your Govee lights setup with our professional-grade mounts designed specifically for your system.
When you order from Deliciosa Decor, you automatically get 25% off your entire purchase, plus free shipping nationwide. There are no minimum orders required. Get the exact number of mounts you need to make your home shine perfectly.q


